
Home / Site Design + Construction / Managing Soils Onsite
Highlights
Why Do This Step?
Site excavation and soil movement are significant sources of carbon emissions, from both the fuel used to move soil and the release of soil organic carbon (SOC) into CO2 when the soil becomes aerated. Minimizing soil disturbance and properly storing soils during construction will avoid unnecessary monetary and carbon costs, improve the long-term soil health of a development site, and reduce project-related emissions. Good soil management planning helps prevent costly and energy-intensive methods of restoring or enhancing soil function post-construction.
Several certification programs, including Sustainable SITES and the Living Building Challenge, incorporate some of these best management practices into their requirements, and offer further resources for specifying methods and monitoring their results.
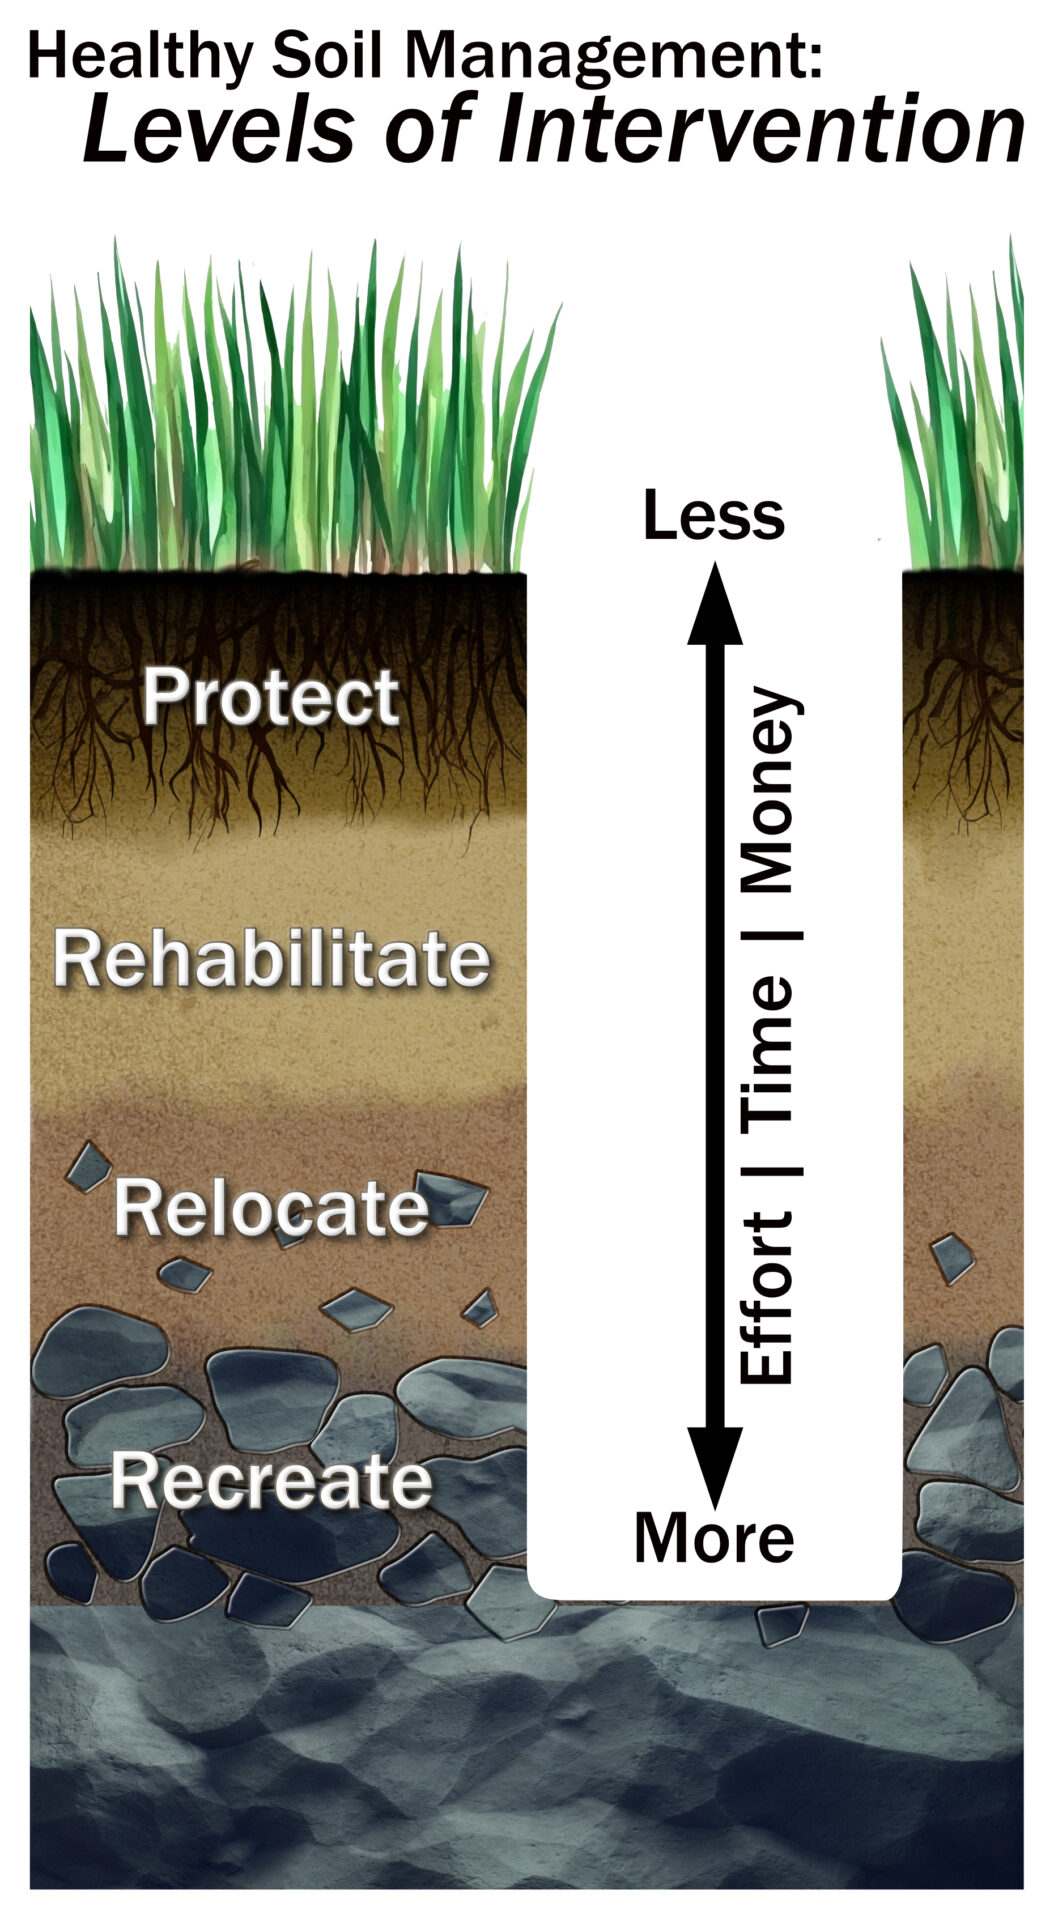
Healthy Soil Management Strategies
Applying these healthy soil management strategies during construction can guide additional actions specific to the project site and program. These strategies can also be considered as varying levels of intervention, from low cost/low intervention (protect) to high cost/high intervention (recreate):
- Protect sensitive and valuable areas from impact
- Rehabilitate soils for better ecological function
- Relocate soils that will be disturbed by construction using best management practices
- Recreate soils using offsite mixes and amendments to add to, alter, or replace removed or compromised soils.
In most cases, the less that soil is manipulated, the quicker it will recover from disturbance.
Systems for minimizing the movement of soils are not complicated, but they require some forethought, collaboration among all actors in a project, and in some cases some carefully chosen equipment.
Directives for successful soil management should be developed prior to the start of a project, and are addressed in the Site Analysis + Planning: Soil Smart Designs section of this guide. If the project doesn’t have an architect or landscape architect involved, many of these general interventions can still happen through the impetus and responsibilities of the General Contractor (GC), landscape contractor, or subcontractors.
Clearing: Determine the smallest area of work necessary to complete the project, and only clear what is absolutely necessary. Preserve as many mature canopy trees as possible. Protect the critical root zones (CRZs) of existing vegetation, following what is outlined in the design documents or what is observed on site prior to any start of construction. Clearly mark this area to prevent excess clearing and disturbance.
Soil removal: Clearly mark with fencing and protect existing natural vegetation that is intended to remain following construction and future planting sites. Soils that are removed should be kept on site for reuse until the end of a project, stockpiled by horizon. In areas close to the building footprint, see Reuse Soils On Site, Intact Soil Lift, and Soil Stockpiling for the best ways to approach soil that must be removed.
Grading: Minimize the site grading for accessibility and drainage and match existing grades wherever feasible to reduce costly soil imports or exports and disposal. Replace stockpiled soils by horizon and section to avoid further compaction during their reinstallation. Check the bulk density of installed soil post-construction to make sure it meets the criteria for the intended functions.
Access roads: Where access is needed, establish temporary roads that are sized to the smallest equipment necessary for the scale of the project. Establish a clearly bounded parking area for contractors to park personal or company vehicles in an area intended for future parking or on previously compacted soils. Restrict vehicles from access to areas intended for vegetation. Wherever possible, use existing roads or lots, rather than parking in the construction site. Use access roads mainly for construction machinery and protect the soil along those paths using mats or woodchips.
Equipment: Choose the lightest and smallest equipment possible with low psi tires.
Materials Staging: When possible, stage materials in the same area as a previously established or intended parking lot, rather than creating an additional space for this purpose. Choose an area of the site with soils that are already compacted or disturbed.
Site Preparation
In most construction projects, the soil is impacted from the very first stages of the project. The vehicles used to clear trees and rough-grade the building site compact the underlying soil. A limit of work is established, within which the parking areas, pathways, and material staging areas are established and flagged. Equipment is brought in and erosion control systems are set up in preparation for excavation.
Protect Healthy Soil and Vegetation BMP
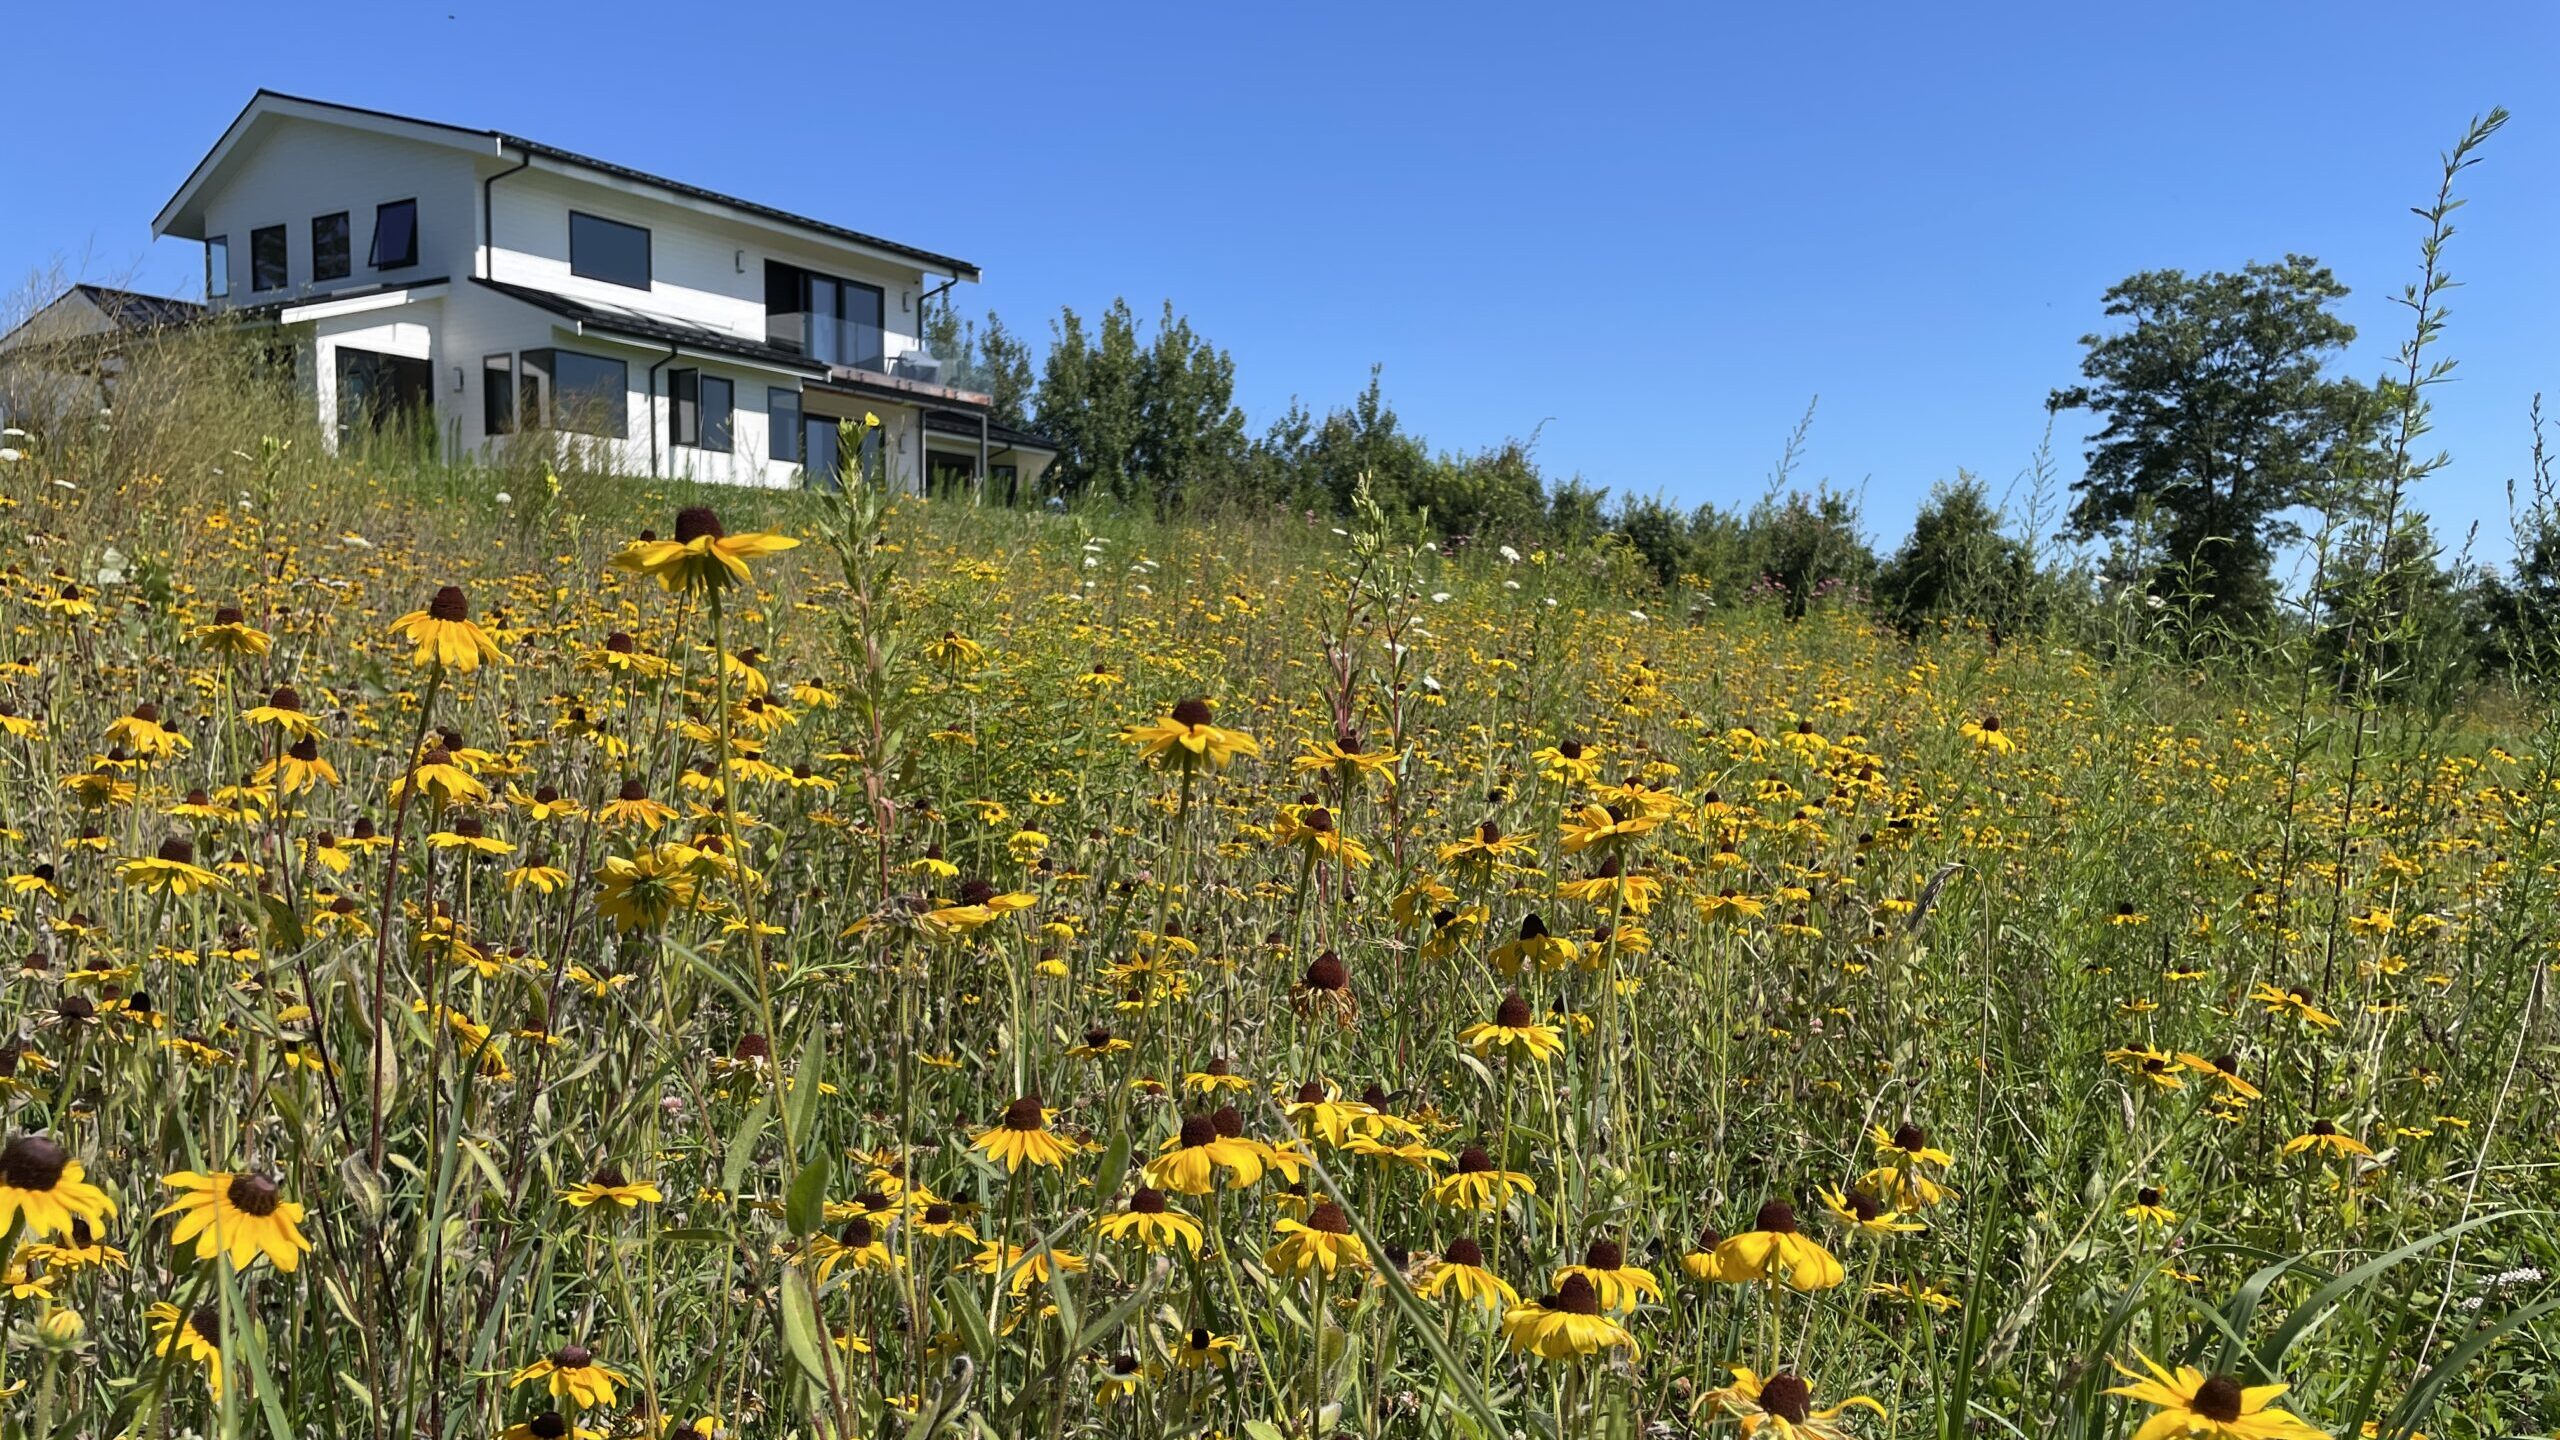
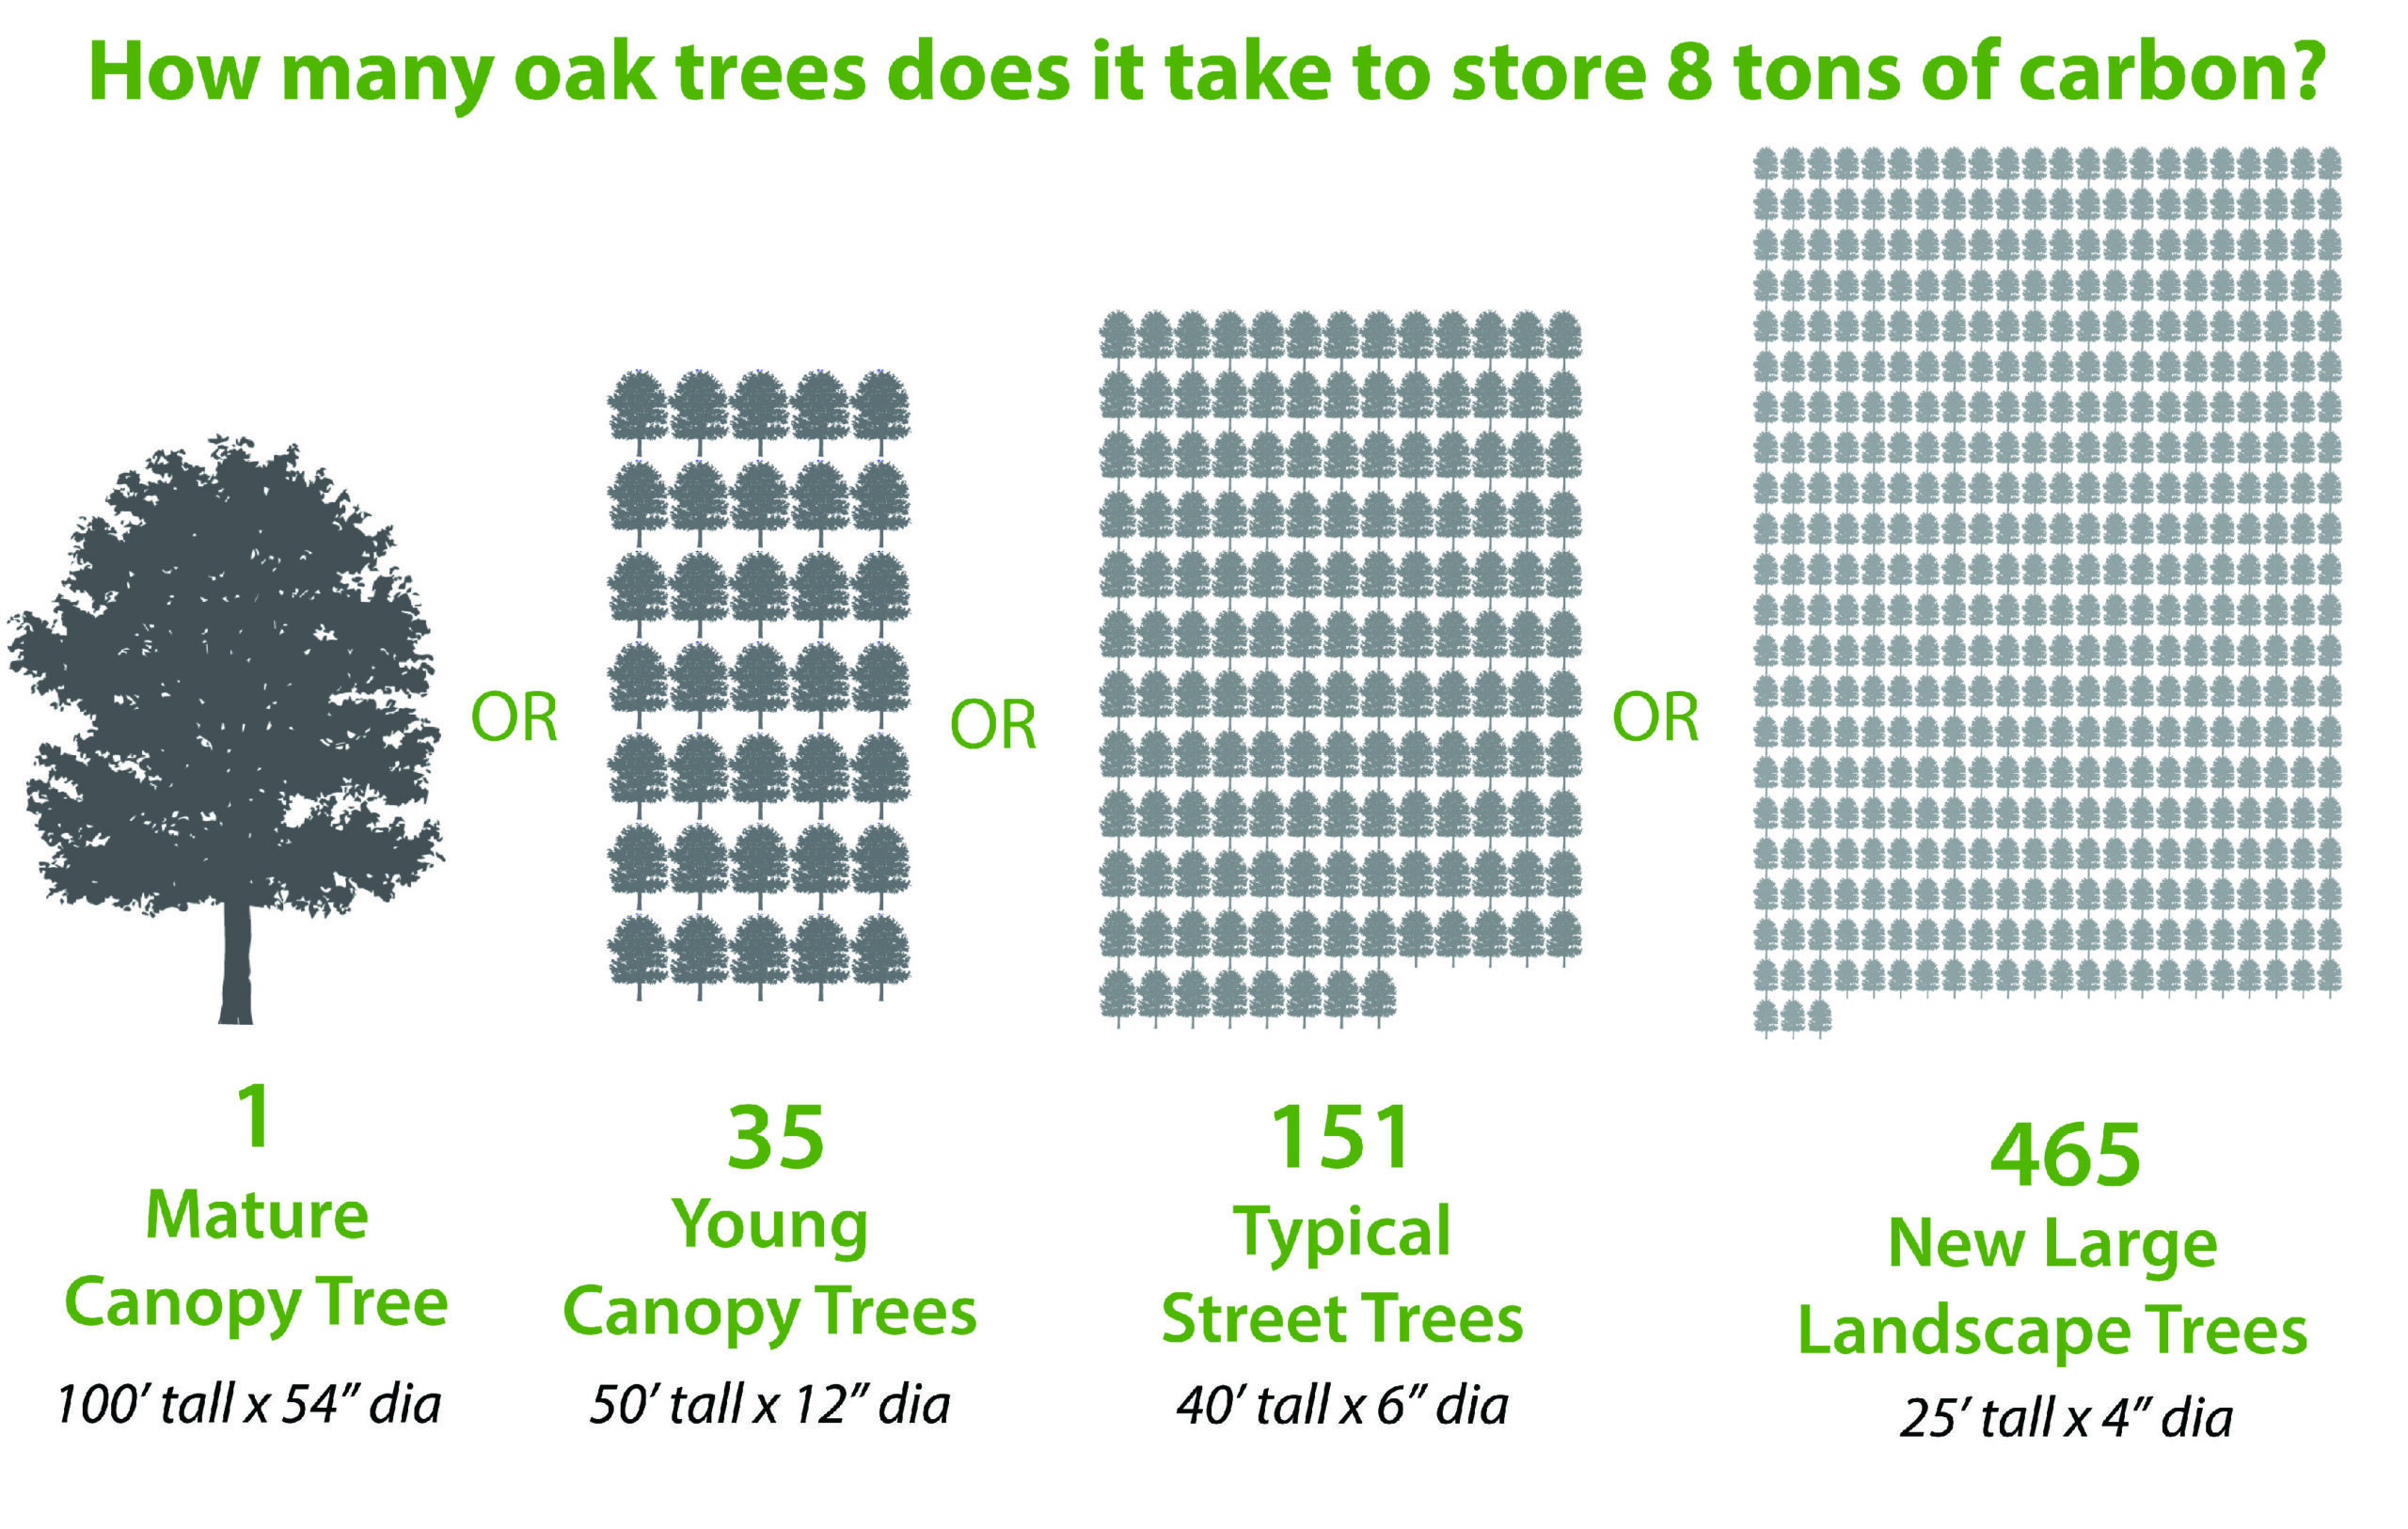
The time investment and costs of restoring or recreating healthy soils and vegetation are much higher than preserving what already exists, especially for woodlands and landscapes with mature trees. It takes hundreds of new, large landscape trees to store as much carbon as one mature canopy tree. Retaining as much existing healthy vegetation as possible—especially trees—and guarding against compaction are the most effective methods for reaping the benefits of healthy soil during the construction process, planting installation, and life of the site. For this to be implemented, the intention must be clearly communicated to all actors in a project who may be working or visiting the site during the construction process. Individuals in different roles should coordinate to ensure consistent messaging.
As a Landscape Architect or Designer:
- Designate an area of work in the site plan to contain all site disturbance and avoid widespread compaction and damage to the surrounding soil and vegetation, using the following principles:
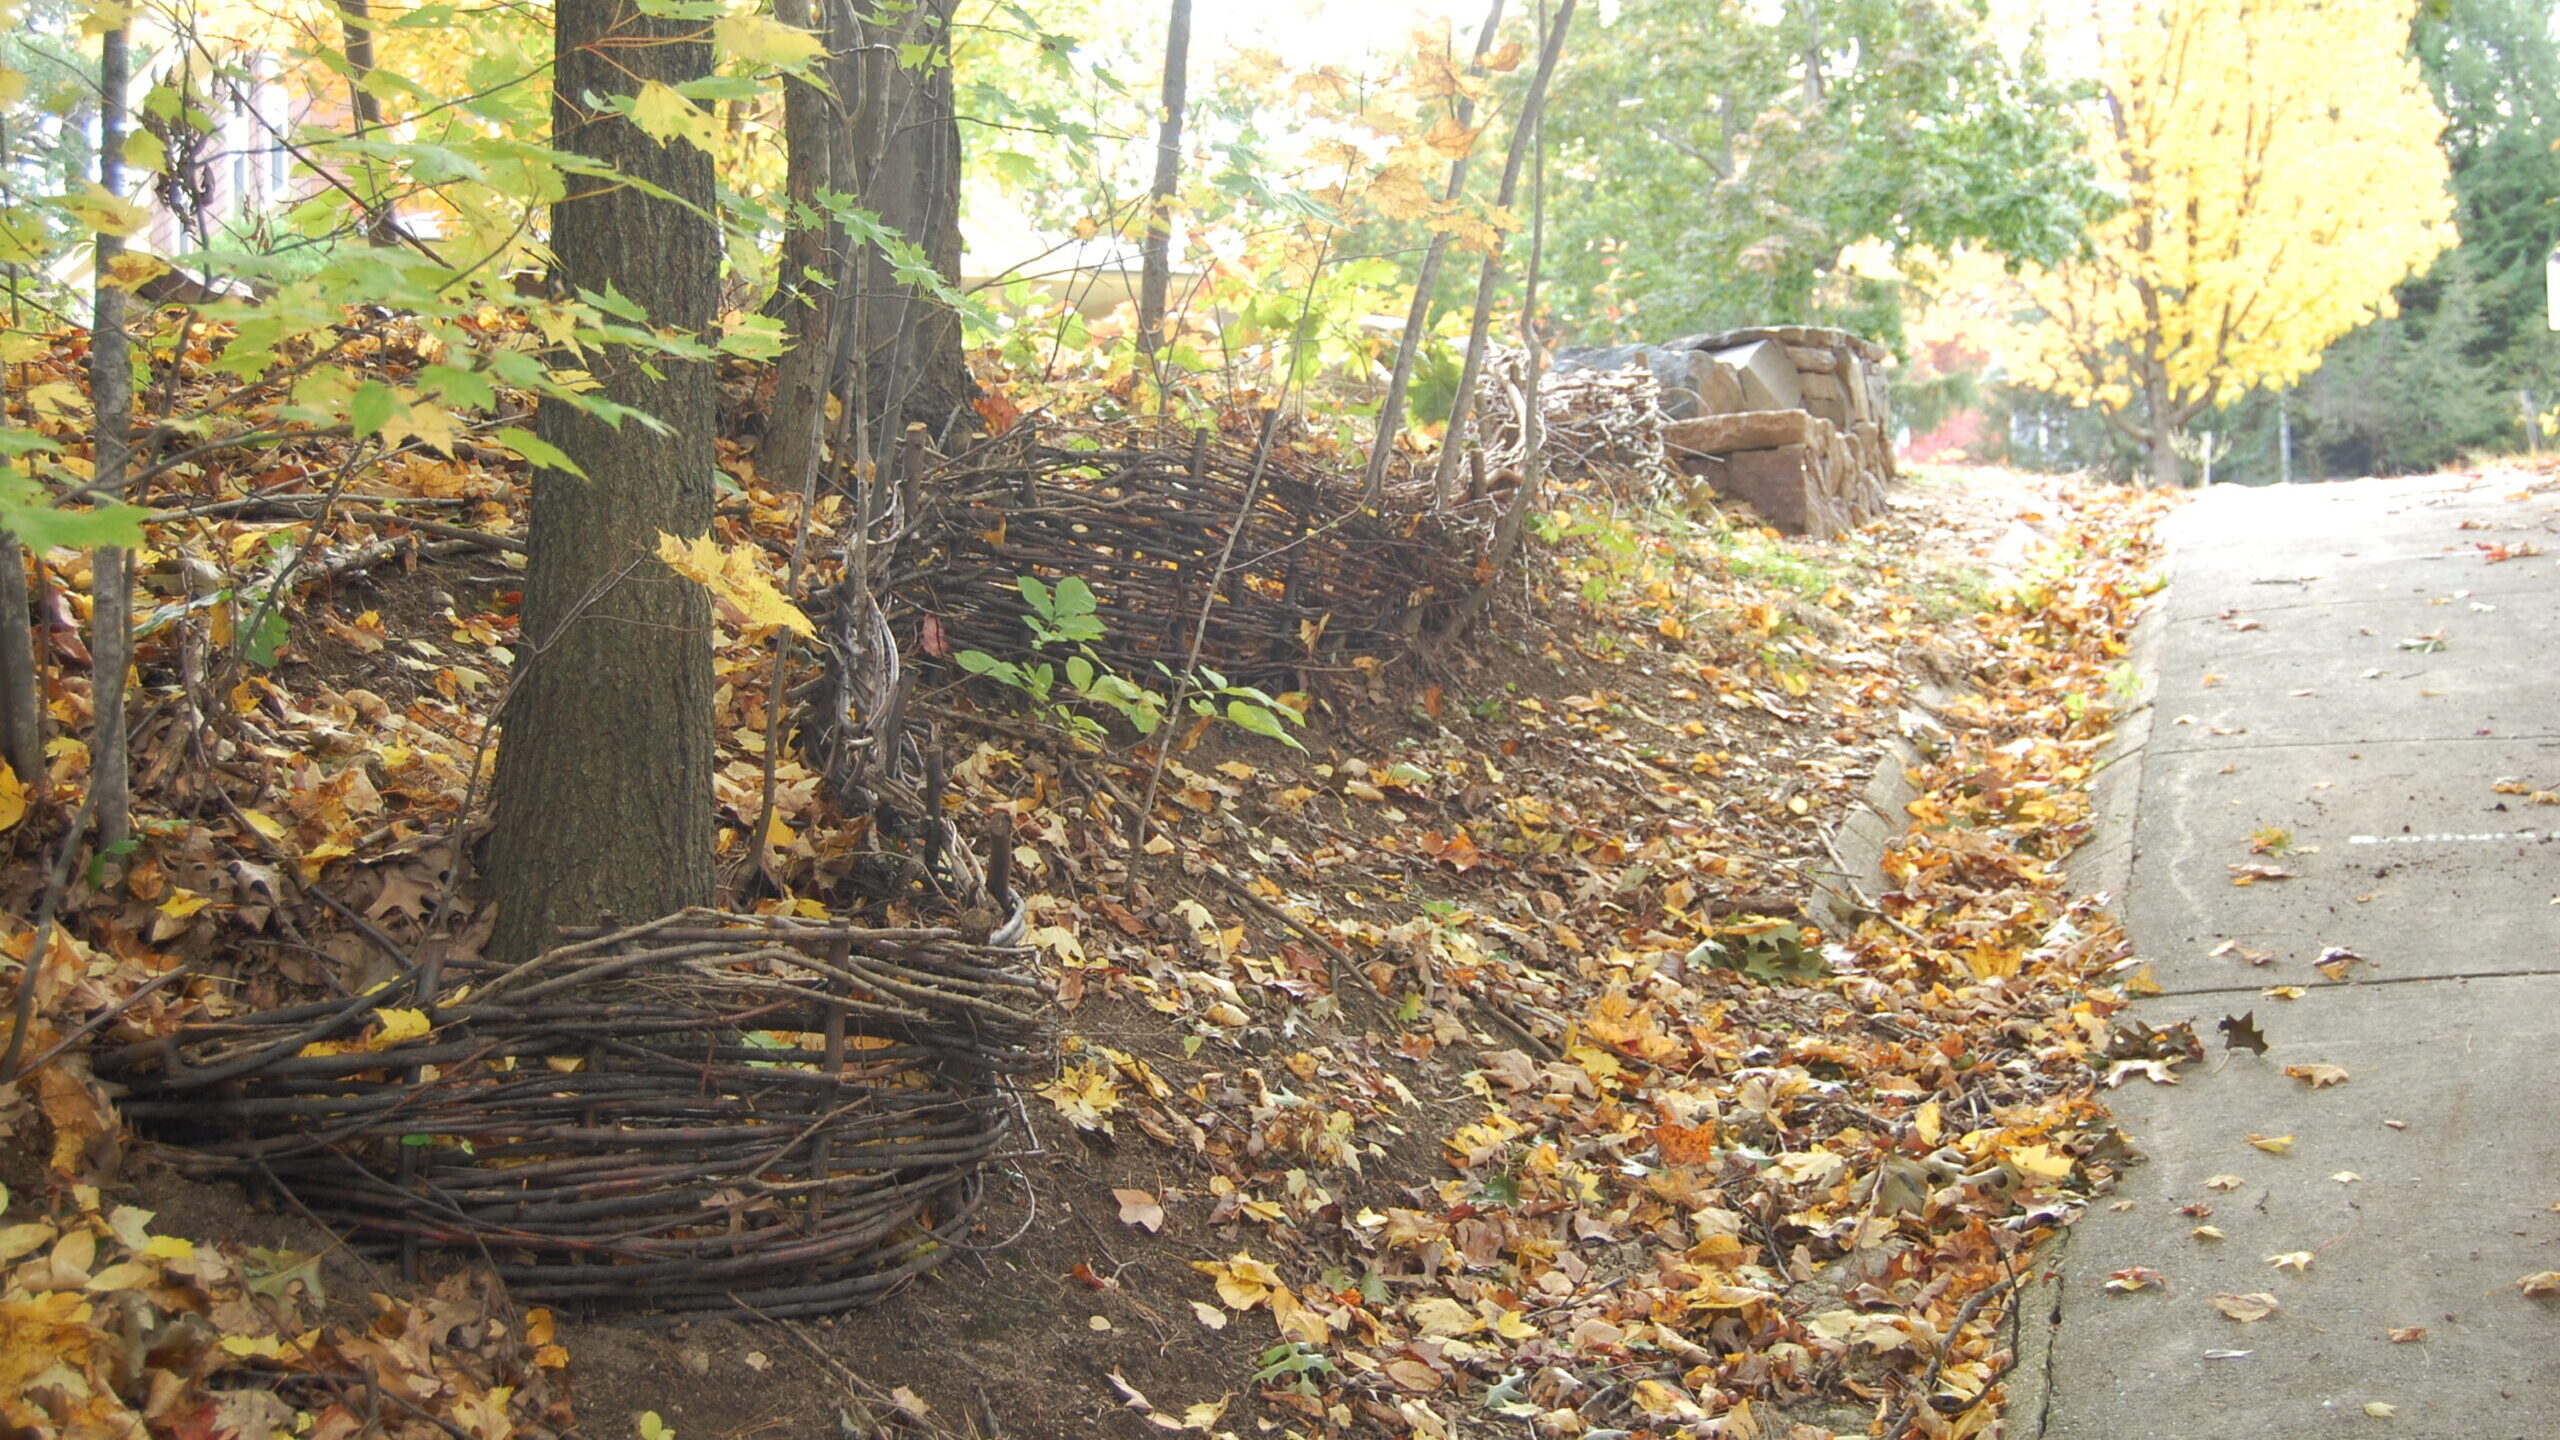
- Protect existing vegetation, such as large, healthy trees, by erecting boundary fencing around the critical root zones (CRZs). Contrary to common beliefs, the roots of most trees do not mirror their canopy. Most tree roots are only 12-18” below the ground, and extend far beyond the dripline. CRZs protect a minimum area of roots to preserve the health of the tree.
- Prioritize the protection of soil in areas that will remain naturally vegetated or be planted after the end of construction. Ensure that these areas are completely bounded off and protected from vehicles until final site preparations for planting. If there are desirable plants in areas slated for demolition, transplant as many as possible, or use intact soil lifts to move healthy sections of vegetation.
- Determine the smallest area needed for access around the building footprint and demarcate or fence accordingly.
- Locate the parking area and material drop-off/staging near the primary entrance in a place where there has already been disturbance and which minimizes the number of paths needed to access the building footprint.
- Require a pre-construction site visit with the contractor to approve and sign off on the flagged area of work established in the design documents. Communicate to the contractors the reasoning behind setting the boundary and not just the location of the lines.
- Ensure the construction boundary fencing encompasses the critical root zones (CRZs) associated with protected vegetation.
- Walk the site with contractors and other consultants to ensure they are aware of the boundaries of the area of work and understand the goal of minimal site disturbance. Clearly communicate that stockpiling materials, driving, or storing vehicles outside of the area of work is not permitted without prior approval. If there are vehicle weight or type restrictions inside the area of work, discuss this with the contractors and post the restrictions on a sign.
- Requiring materials to be transferred to (low psi) tracked machinery on site may be necessary to protect desired vegetation.
- Ensure that the areas intended to be planted in the final plan are completely bounded off and protected from compaction, using strategies in the next subsection: Protect from Compaction BMP
As a Landscape Contractor or General Contractor
- Erect construction fencing and erosion controls around the area of work that is specified in the design documents. If this has not been established yet, delineate the area of work according to the principles outlined above.
- Establish a system for procuring and transferring materials to lower-psi machinery onsite (if determined to be necessary).
- Ensure that all workers and subcontractors are aware of the boundaries of the area of work and understand the goal of minimal site disturbance. Prohibit stockpiling materials, driving, or storing vehicles outside of the area of work, without prior approval.
Protect from Compaction BMP
The most common negative impacts of development on soil health—and one of the most difficult to reverse—is soil compaction. Compaction is the result of concentrated pressure that forces soil particles into tighter formation, and is measured by the bulk density of soil (see Soil Primer + Assessment Toolkit). In a typical construction project, some compaction of the soil in and around the building foundation is unavoidable for safety, cost, and efficiency reasons. However, unnecessary compaction also occurs during infrastructure and utility installation, and from vehicle traffic and material staging.
When soil is compacted, it no longer has the capacity to infiltrate water or absorb nutrients, therefore exacerbating issues with runoff and drainage on the site. Healthy soils help protect downstream waterways from contamination, but compacted soil loses the ability to filter, absorb, and decompose pollutants. Soil compaction also significantly reduces water and nutrient availability for plant roots, stunting plant health and growth. Slower-growing vegetation reduces or limits the additions of fresh organic matter that can build up in the soil over time, leading to long-term depletion of SOC.
On loose soil, the first vehicle pass causes the most subsoil compaction. Subsequent passes increase the area and severity of compaction. In most soils there is little increase in subsoil compaction after four to five passes (Parker et al., 2021). Wet soils will compact more easily than dry soils (try making a sand castle with dry sand) because the water in the pores acts as a lubricant, allowing soil particles to slip together into tighter formation. The one exception is in extreme temperatures: frozen soil will resist compaction. Once soil is compacted, it cannot be easily restored to its previous state.
The following actions will prevent unnecessary soil compaction, and should be applied to as much of a site as possible, especially areas that are intended to be planted in the final plan:
- Cover the access paths to construction sites with at least 6” of wood chips on top of a geotextile landscape fabric to prevent localized compaction from construction vehicles. The woodchips can then be reused as mulch after the bulk of the construction is completed.
- Schedule the heaviest work that requires the largest equipment during the winter months when the soil is frozen.
- Establish a drop-off area near the primary entrance for materials. Use lower-psi equipment to transfer materials to their locations on site.
- Direct traffic routes away from designated landscape areas.
- Use narrow access roads to restrict unavoidable compaction in wheel tracks.
- Limit equipment use and soil moving to periods when the soil is dry; to avoid excessive compaction and erosion, do not operate excavation equipment or spread soil when soil is wet or significant precipitation is forecast for the immediate future.
- Select lighter-weight equipment with wide, smooth, low-pressure tires or low-ground-pressure tracked equipment. The greater the axle load, the greater the subsoil compaction.
- If crossing a wetland or wet area, install mats or temporary bridging to avoid damaging soils.
During Site Construction
During a typical construction project, soil is both intentionally and unintentionally altered. In the design phase, a Soils Management Plan should be developed to specify soil removal, stockpiling, grading, and access establishment criteria. These recommendations may be used to develop a Soil Management Plan:
Reuse Soils Onsite
Reusing onsite soils will result in lower embodied carbon emissions from soil movement, and faster soil health restoration and establishment after construction. Soil can be reused through an intact soil lift or through stockpiling it on site. If soils cannot be protected, the next level of intervention is to rehabilitate the soil in place, and then to relocate the soil for use elsewhere on site. If the soil is stockpiled on site, it can be amended if necessary and used during the site grading, saving costs by preventing the need to import soils.
Intact Soil Lift BMP
When possible, move non-invasive herbaceous and shrub plants as part of intact soil blocks.The intact soil lift moves as many layers of existing soil and vegetation as possible in a single cut, is less damaging and requires less space than stockpiling soil, and preserves desired vegetation and healthy soils that are slated for demolition. Fragile vegetation and soil layers can be relocated temporarily or installed elsewhere, however immediately transplanted lifts will have a higher success rate of establishment. This method preserves soil horizons, roots, microbial networks, seed banks, and vegetation, maintaining high integrity and function. In addition to preserving soil and soil carbon, this can:
- Preserve native vegetation that is adapted to local conditions and that represents local biodiversity;
- Reduce nursery purchasing, transporting, and planting costs;
- Reduce the need to purchase and transport supplemental soils; and
- Eliminate the need to stockpile soils and the associated costs of moving the soil twice, of providing erosion and sedimentation controls associated with stockpiling, and of monitoring and maintaining the stockpiles.
If the soil lifts are being relocated onsite, the designated planting area should be prepared before excavation. Transferring intact sections of soil lifts directly to the planting area rather than storing them temporarily will save project costs, reduce SOC degradation and carbon emissions, and result in a higher rate of successful establishment.
An intact soil lift may not be the best option if:
- Invasive species are present at unmanageable levels;
- Trees and tree rooting are too dense to allow for cutting and moving without significant damage; or
- If contaminated soils are suspected. If soil test results show that soils are free of contamination, soil lifts should be considered. If not, then appropriate remediation measures should be taken instead (see Site Analysis + Planning).
If a soil/vegetation lift makes sense, transport it directly to the installation area if possible, or if not, store it intact in individual blocks, rather than mixing it into stockpiles:
- Cut and lift squares of the soil with intact vegetation if possible and set aside in a temporary location;
- Establish erosion controls around the perimeter of the soil blocks;
- Maintain viability of vegetation and soil microbial life by establishing an appropriate watering schedule. Use soaker hose or mist to avoid saturating the blocks; and
- Install soil and vegetation blocks in their relocation site as soon as possible to reduce stress on vegetation and soil microbial life, and reduce risks of desiccation and erosion.
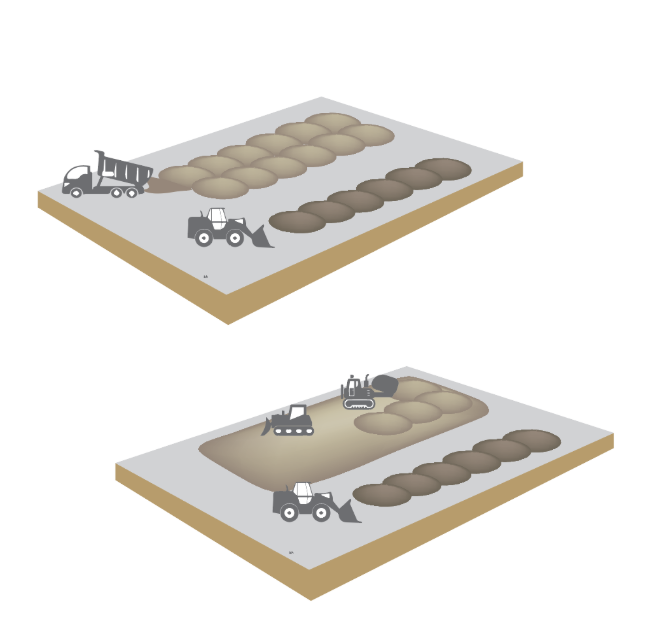
Soil Stockpiling
Proper stockpiling methods depend on various site-specific factors, including soil type, moisture, texture, storage duration, available space, weather conditions, equipment, and management capabilities. Excavating and stockpiling soil destabilizes soil organic carbon (SOC), accelerating organic matter decomposition and CO2 release. This process disrupts soil structure, biota, and root-mycelial connections, leading to decreased soil health and reduced carbon functions.
As much as 60-90% of the existing SOC in soil can be lost during excavation, releasing previously stored carbon into the atmosphere and damaging the structure and integrity necessary to resume carbon sequestration and soil health restoration after construction. Deep stockpiles can also compact, creating anoxic conditions that then become a source of methane emissions when they are sieved and spread. Wetland soils that are stockpiled are at especially high risk of desiccating, which will lead to the release of SOC.
Soil Removal BMP
When excavating soil for stockpiling, the following steps apply to upland soils. In Massachusetts, all wetland soil disturbance or movement requires environmental permitting. Note that the removal should be approached according to soil horizon, as each horizon will later be stockpiled separately.
- Scrape/grub the vegetated layer and screen the topsoil (soil horizons O + A) to remove large or matted roots, vegetation, debris, and rocks over 2 inches.
- Retain the biomass for composting. Composting onsite is preferable, with management considerations as follows: solarization, turning, seed bank management.
- If the subsoil (soil horizon B) must also be removed, remove this separately from the topsoil.
- Stockpiles should be kept 100 feet from a wetland

Dry Soil Stockpiling BMP
Once the soil is removed, it should be stockpiled differently according to the soil type. If the soil that was removed is well-draining or dry soil, the following guidelines apply:
- Organize soil stockpiles by horizon (A + O, B) in loose-tipped heaps (preferably less than 6 feet tall)
- If there are staging area constraints, use tracked machines to level heaps and add second layers. Limit low organic soils to 4M depth and high organic soils to 2M or less.
- If stockpiles must exceed these dimensions, include aeration piping consisting of 3-4” perforated pipe, spaced no more than 5’ in any direction.
- Shape the mounds to enable drainage and avoid ponding, and coordinate with erosion control methods.
- Using tracked front-end loaders and bulldozers is acceptable, due to the low plasticity of dry soil.
Wet Upland Soil Stockpiling BMP
All excavation and soil moving should happen when soil is as dry as possible to avoid excessive compaction and damage to the soil structure. However, if the soil is saturated during the timeframe when it must be moved, the following guidelines should protect the soil as much as possible in the stockpiling process:
- Place in windrows with clear space between piles to support drainage. Organize rows by horizon (2M or less)
- Use an excavator for moving high-plasticity soils
- Clear space sufficient for equipment to pass between mounds and not drive over any stockpiled soil—this stands whether machinery is tracked or not.
- Once dewatered stockpile layering or consolidation can occur similarly to dry soils, see instructions above. For this, excavators should be used, and vehicles, tracked or not, should not drive over the piles.
Short-term Stockpile Maintenance BMP
Stockpile maintenance is essential in order to prevent erosion, drying, the loss of organic matter and SOC, as well as to prevent the growth of weeds or invasives on the stockpile. When deciding on a maintenance approach, first identify how long the soil will be stored. If the soil will be stockpiled only for a short time—for 12 weeks or less—then the guidelines below are the best maintenance protocol.
- If extreme weather conditions are anticipated, cover stockpiles with an air-and-water permeable cover, e.g., jute mat or compost felt, to avoid excessive drying or erosion.
- In dry conditions, irrigate in order to keep the soil garden-moist and to avoid the loss of organic matter. Maintain this level of moisture prior to re-installation of soil.
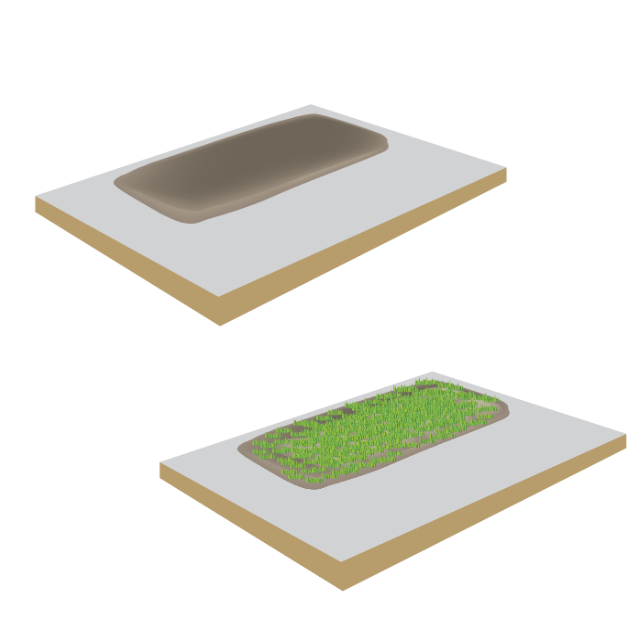
Long-term Stockpile Maintenance BMP
For the maintenance of soil that will be stockpiled for longer than 12 weeks, the following guidelines should be followed:
- Cap with O&A horizon soils, 0.3 to 1M depth max, depending on soil composition.
- Seed with a temporary crop like annual rye, oats, or crimson clover and coordinate with erosion control.
If the soil will be stockpiled for a year or more, consider the following approaches:
- The duff or lawn/perennial roots and annual vegetation cover could be left and integrated rather than stripped.
- Consider using a tarp rather than seeding with a cover crop, in order to avoid cross-contamination from seeds and adjacent vegetation. Tarping is useful if you suspect invasive species to be present in the soil.
- Plastic sheeting with a minimum thickness of 4 mils, or woven or non-woven geotextile fabric, may be used to tarp stockpiles.
- Pros:
- If invasive species are present, tarping for a sufficient period can reduce or kill seeds.
- Tarping can retain some moisture.
- Cons:
- Can result in high rates of desiccation, loss of light, and loss of soil biodiversity.
- In addition, polyethylene plastic sheeting tends to be the typical product used for tarping, which over a longer timescale will contribute to microplastic pollution in soil and oceans.
- Pros:
- Plastic sheeting with a minimum thickness of 4 mils, or woven or non-woven geotextile fabric, may be used to tarp stockpiles.
- Stockpiled soils can be covered with an erosion control cover and a sediment barrier should be installed along the downgradient edge to collect runoff and sediments.
- Stockpiles should be located at least 100 feet from any wetlands or waterways/waterbodies, whenever possible. If it is not possible to maintain this distance, then additional erosion and sedimentation controls and a more robust stockpile maintenance schedule may be necessary.
Wetland Soils Stockpiling BMP
In Massachusetts, disturbing/impacting wetland soils and the associated 100-foot buffer zone is regulated under the Wetlands Protection Act (310 CMR 10.00) and local wetland bylaws and regulations. Local Conservation Commissions are responsible for permitting activities that have impacts on wetlands. Conservation Commissions have the authority to establish soil movement and stockpiling conditions and procedures on a case-by-case basis.
The Massachusetts Department of Environmental Protection has published a guide for constructing wetland replacement areas, Wetland Replacement in Massachusetts (Jackson et al., 2018). It addresses all aspects of wetland construction for the purposes of replacing wetlands impacted by construction, including soils-related issues.
Critical approaches to improving the protection, restoration, and establishment of healthy wetland soils during construction include:
- Observing and monitoring the hydrology of proposed wetland replacement areas to determine the adequacy of the site for wetland formation prior to construction, and observing and monitoring the hydrology of adjacent wetland areas and proposed wetland impact areas.
- Lifting and transferring intact sections, including intact A and B horizons, roots, and native vegetation, of wetlands (i.e., wetland translocation) (Davies et al. 2019) impacted and moving intact blocks to replacement areas for direct installation, rather than stockpiling soils and destroying native vegetation. See “Intact Soil Lift BMP” above for technique and considerations.
- Transplanting individual mature wetland shrubs and plants from disturbed areas on site into replicated wetland areas.
- Re-use of wetland impact area soils in wetland replication areas (where translocation of intact sections is not feasible).
Benthic Sediment Dredge
The high organic content (benthic sediments) in liquid sludge will release large amounts of methane if kept wet and exposed to an aerobic environment. Dewatering the sludge through stockpiling will release carbon dioxide emissions through the active decomposition of organic matter in the soil, but will reduce methane emissions. Methane traps approximately 120 times more heat than carbon dioxide, so methods that enable dewatering and aerobic stockpiling should be prioritized. Once dewatered, soils can be managed similarly to wet upland soils.
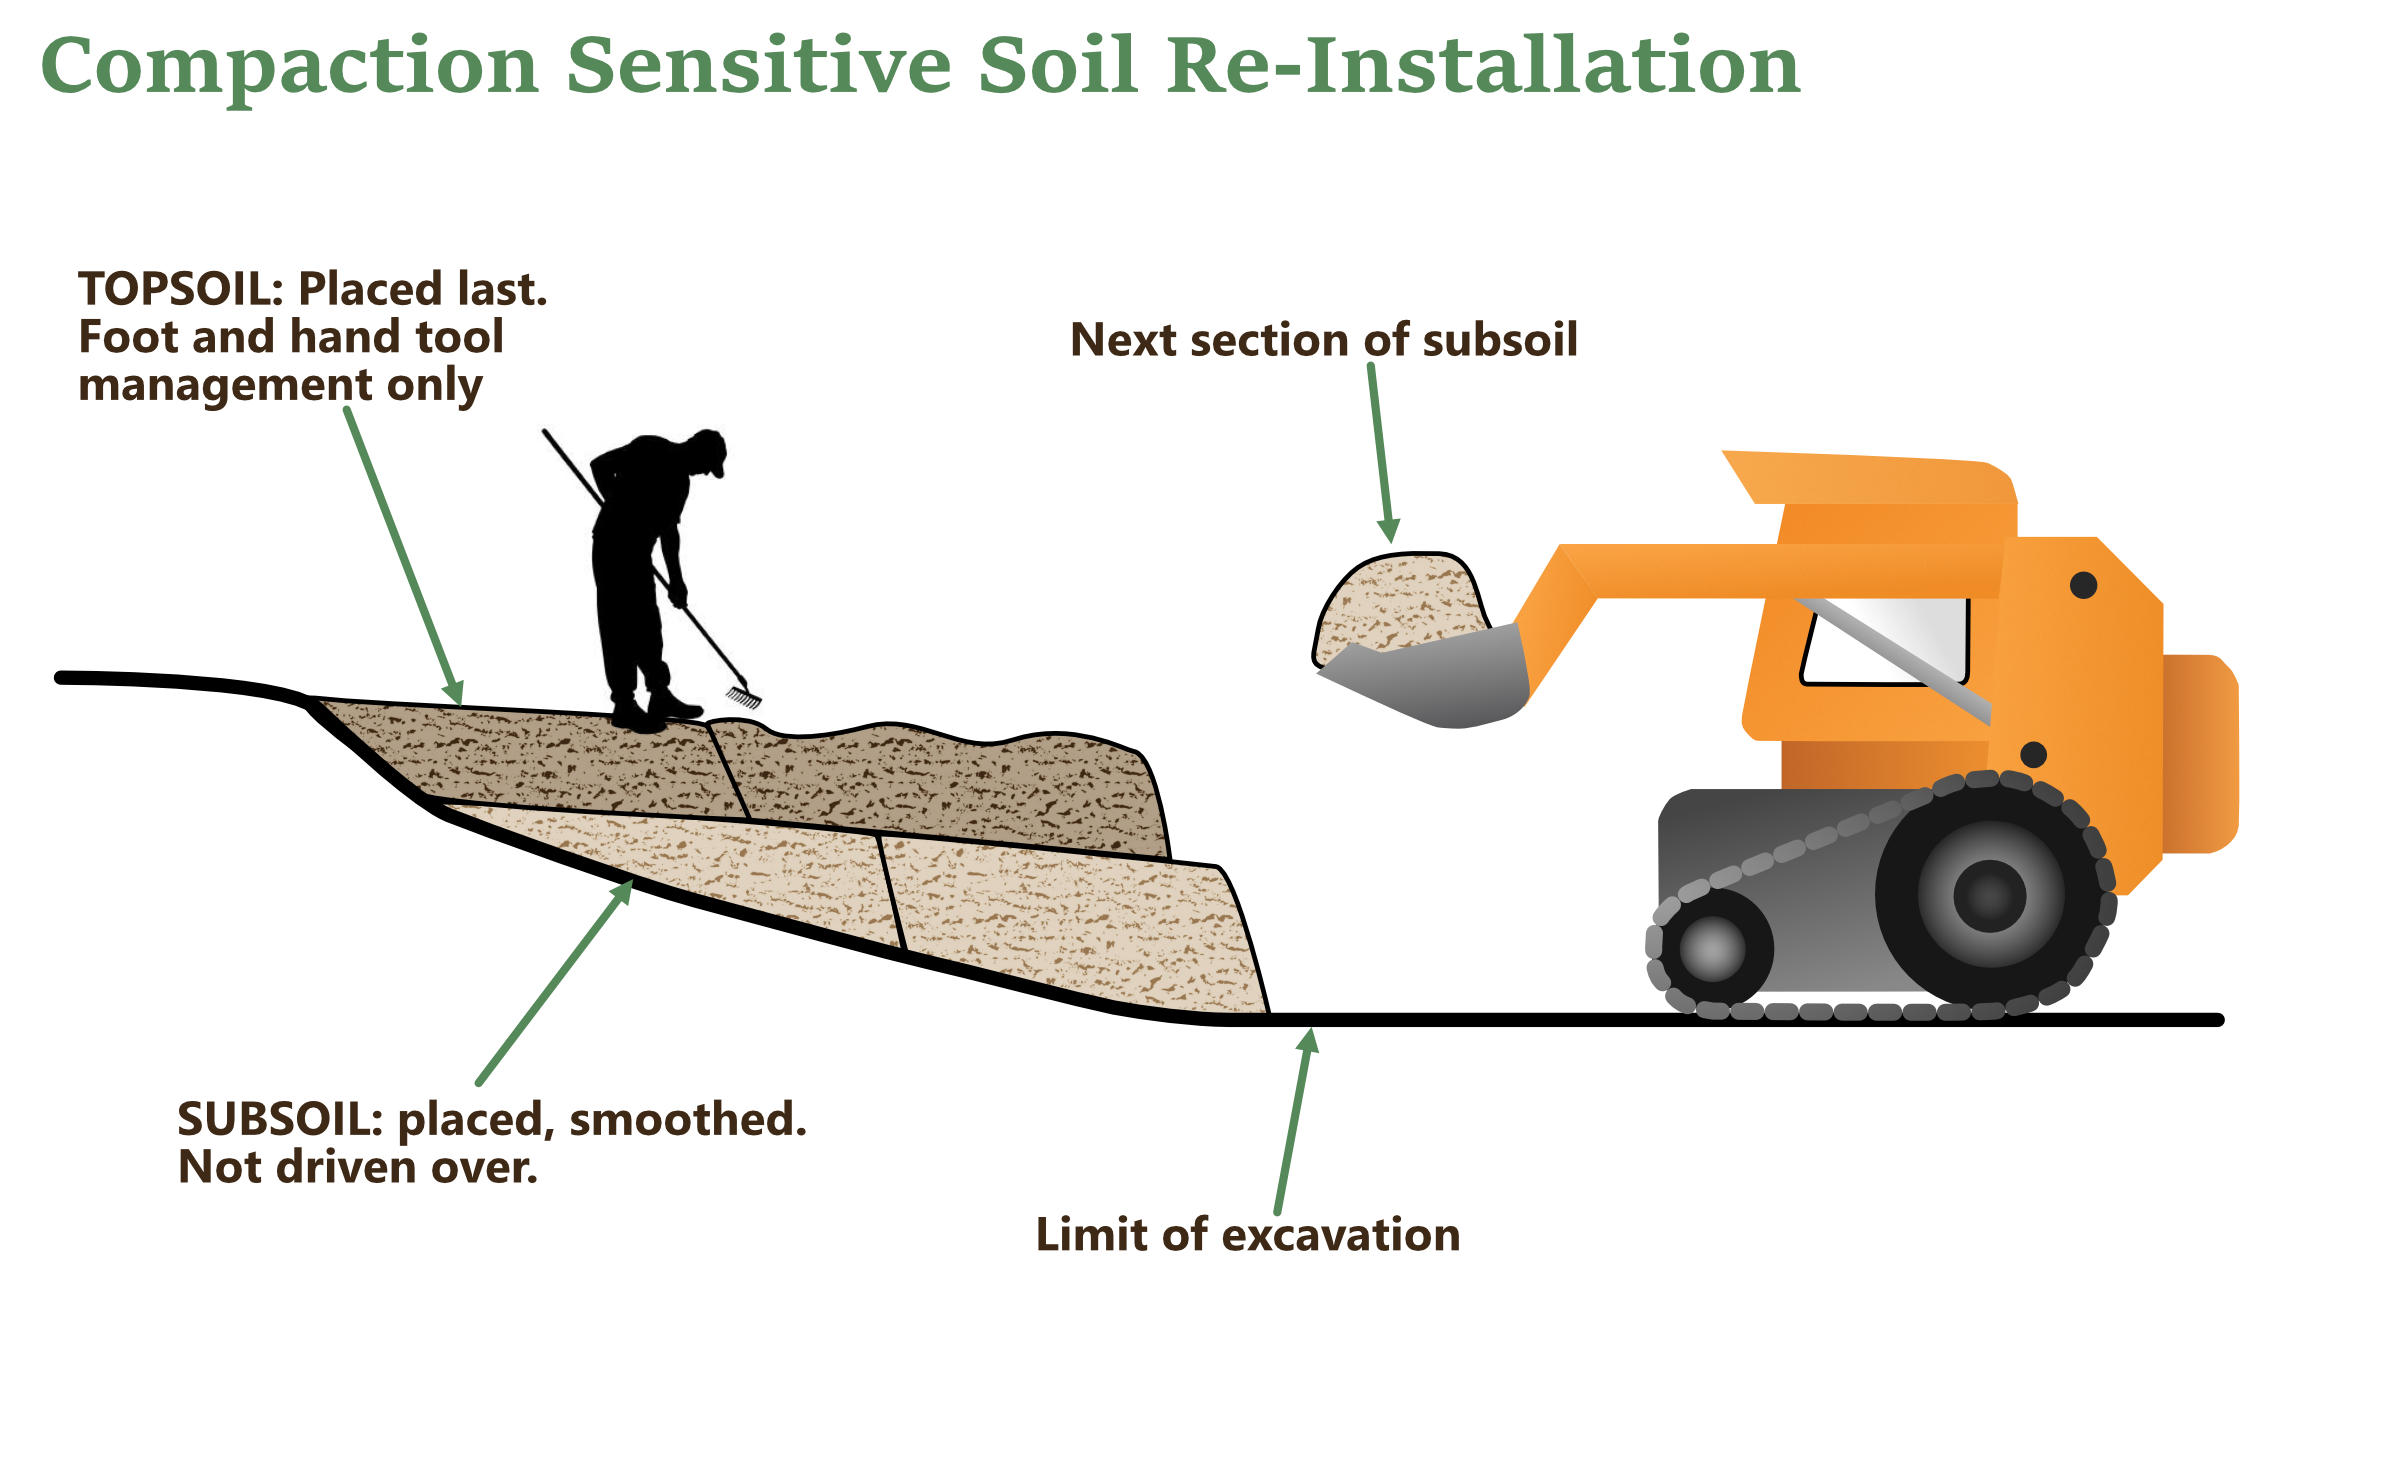
Soil Placement
Stockpiled soil should be placed dry, with as small equipment as possible. Start with the lowest disturbed horizon. Cover only enough area to allow the upper horizons to be placed without compacting the first layer. Move toward the edge of the disturbed area in succession.
Final Grading + Post- Soil Management
Grading is usually one of the last steps prior to cleaning up and leaving the site. The rough grading is finalized and approved, taking into consideration drainage and the final depths needed for the hardscaping. The topsoil, either from an imported source or from onsite stockpiles, is spread after the hardscaping is finished and before planting begins. Amendments may be incorporated before or during planting, and straw or mulch is added. Irrigation may be installed before or after planting. In all of these steps, there are ways to minimize the damage to soils left on the final site.
Post-Construction Soil Performance Standards
Post-Construction Soil Performance Standards should be specified in a Soil Protection and Management Plan and be based on the final landscape type. Including them in the post-construction sign off process ensures accountability.
These standards should ensure that the worst of the damage done to soils during construction is mediated, and will result in faster recover and higher rates of vegetation success.
Regulatory bodies, zoning boards, and conservation commissions can also draft post-construction soil performance standards that are regionally specific and set a minimal level of standards to be enforced through the permitting process.
Decompaction
A significant part of rehabilitating soil at the end of construction in order to maximize future soil health is decompacting soil. Decompaction addresses areas with high bulk density (see Soil Primer + Assessment Toolkit) that have been impacted by vehicles and machinery during the construction process. Ideally, Planning Soil Smart Construction Practices will prevent excessive site compaction, however some compaction will be unavoidable during construction and should be addressed before the final sign-offs.
Decompaction involves physically breaking up these compacted areas by shattering the soil structure, and reintroducing more space for the movement of water, air, and organisms. Sandy soils are easier to remedy than high silt and clay soils. There are various methods for decompaction using mechanical equipment or hand tools. The method and tool selection should be informed by the scale of the site and severity of the compaction (Kees, 2008).
Decompaction BMPs
All disturbed areas must be decompacted prior to topsoil installation and planting in order to provide a rooting depth of at least 8 inches unless a depth for specific vegetation or function is determined. Depths of decompaction and target penetrometer readings are determined by the soil composition and target soil functions (see Soil Primer + Assessment Toolkit). Please refer to these specifications; general decompaction methods are outlined below. Keep all equipment out of already decompacted areas and work backwards away from excavated soils so that treated soil is not trafficked by the equipment. This may require transferring large trees and shrubs to hand carts during planting installations. It is advisable to reflag buried utilities prior to decompaction activities to avoid accidental damage.
The following methods for decompaction may be tailored for specific site conditions and target outcomes.
Tine Bucket Method
This method is most suitable for subsoil decompaction on sites where the topsoil has been removed and the subsoil compacted during construction.
- Incorporate compost into the subsoil using a tine bucket (or manure bucket), tree spading machine, or similar equipment. Prior to decompaction, add an average of 2.5 to 3 inches of compost to the soil surface to achieve target organic matter percentage as defined by each soil profile.
- Commingle the soil to a depth of 12 inches: Insert the tree spading machine or bucket through the compost layer and into the subsoil and raise a bucket of soil at least 24 inches above the soil surface. Tip the bucket and allow soil to fall. Repeat this procedure until no clumps of compacted soil larger than 12 inches in diameter remain and 50% of the soil is in clumps 6 inches or smaller. The tines of the bucket can be used to break apart larger clumps if necessary. Spread the topsoil either mechanically in sections during decompaction, or by hand once the decompaction is complete to avoid recompacting the area.
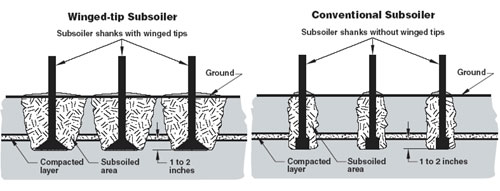
Deep Ripping Method
This method is most suitable for large-scale sites with severe compaction from construction or pre-existing compacted subsoils. As this method requires heavy machinery to conduct it will need to be followed with additional decompaction of topsoil and shallow subsoil.
- Winged-tip or conventional-tip shanks are mounted to an excavator arm or used as a pull-behind tractor attachment and dragged through the subsoil to cut channels where air and water can penetrate, lowering the average bulk density.
- The depth of the ripping should extend 1-2” below the depth of the compacted area with a spacing of 12 inches between passes or blades. Where possible, drive along (parallel to) ground contours to increase water capture and reduce soil erosion. In very compacted areas, two passes at an angle to each other may be required to effectively fracture compacted soils.
- See the “Soil Ripping” section in “Alleviating Compaction from Construction Activities” for further information on tools used for soil ripping.
Air Spading Method
- In areas around sensitive underground elements like buried utilities and critical root zones of existing trees, air spading may be a more appropriate decompaction method.
- Lightly watering the soil prior to using an air spade can ease the process and reduce airborne dust. Moisten the soil enough to facilitate its movement but not enough to saturate it.
- Work in a circular or linear pattern, moving the air spade at a rate of one to two feet per second until the soil is visibly loosened. Several passes may be required for heavily compacted areas.
Landscaping: Restoring Soil Health After Construction
Once a building project or landscape installation is completed, how the landscape is managed plays a crucial role in the health of these soils, but only within the narrow margins of the soil’s dynamic properties. Design soil profiles for the desired soil function and landscape type. Without ideal soil conditions, establishing and maintaining healthy lawn or other landscaping on these degraded soils will require ongoing frequent and intensive management to provide the water and nutrients that might otherwise be provided by deeper, healthy soils.
Because a “soil-smart” project may utilize several different soil management strategies on the same site to achieve the highest overall standards of soil health, as well as have several different landscape types in the final design, the final stages of grading and soil preparation for planting may be complex. This section covers BMPs for the establishment of some common landscape types organized by the four Healthy Soil Management Strategies:
- Protect sensitive and valuable areas from impact
- Rehabilitate soils for better ecological function
- Relocate soils that will be disturbed by construction using best management practices
- Recreate soils using offsite mixes and amendments to add to, alter, or replace removed or compromised soils.
Lawn
A well-established lawn can have significant soil health benefits, including water filtration and infiltration, erosion control, and carbon sequestration and storage. Unfortunately, lawn is often installed over compacted, leached, low-nutrient soil, and never reaches its full potential. To maximize the SOC capabilities of the lawn, soils should have a minimum of 3% soil organic matter. If 25% of the open lawn in Massachusetts (based on 2016 data) were planted with trees and the overall organic matter raised to a minimum of 3% in the top 8 inches, lawns would sequester an additional ~180,000 tons of carbon dioxide equivalent per year (HSAP 2023).
The target characteristics for establishing healthy lawns should be:
- Subsoil Preparation:
- Decompaction (below topsoil): 8-12”
- Organic Matter Content: 3-5%, amend with compost in situ as necessary
- Penetrometer meter reading <300 PSI in subsoil to depth of 18” below finished grade using ½” tip
- Topsoil Preparation/Installation:
- Depth of topsoil 6-8”
- Organic Matter Content: 4-6%, amend with compost in situ as necessary
- pH: 6.0-6.5, modify with lime as indicated by soil test
- Penetrometer meter reading <200 PSI with to bottom of topsoil layer (6-8” below finished grade) using ½” tip
Lawn is very easily compacted. Protecting it from vehicle traffic is difficult on a busy and space-constrained construction site, however it is essential to maintain healthy soil structure. In uncompacted soil, the roots of some grasses can penetrate up to eight feet underground. The farther down the roots grow, the higher the rates of carbon sequestration and water infiltration will be. Protecting the lawn completely from vehicle traffic is the only way to retain healthy soil function.
- A core aerator is the best option for highly compacted lawns. This method removes small plugs of soil, creating channels that allow air, water, nutrients, and microorganisms to penetrate the soil and help break up the compaction.
- For moderately or minorly compacted lawns, a spike aerator or manual aeration with a garden fork are the best methods to restore soil porosity.
- After decompacting, build up the organic matter using organic amendments (see Specifying Blended + Amended Soils). Compost, shredded leaf mulch, and liquid organic fertilizers are good options for a damaged lawn.
- Existing lawns can be diversified through selective mowing, the elimination of broad-leaf herbicides, and fall overseeding after aeration.
Lawn is one of the easiest and most reliably successful landscape types to relocate.
- At the beginning of a project, all healthy lawn that is being replaced by the construction may be stripped and rolled using a sod cutter. This should happen at the beginning of the demolition.
- Sod rolls should be stored in a cool, shaded location. Avoid stacking rolls. They may be misted but should not be watered or saturated. Never tarp stored sod; this will build heat and encourage decomposition.
- Install the sod over decompacted subsoil amended with compost.
Lawn is most often recreated by seeding or installed from sod rolls.
- Whenever possible, seed lawns. This allows for better root establishment, and greatly reduces the carbon footprint associated with intensive sod farming and transportation, unless the sod can be harvested from on site.
- Hydroseeding can save time and water resources, as well as protect soils from erosion. Hydroseeding can utilize a variety of natural wood fiber mulches, and incorporate native seeds into a lawn mix.
- Diversify lawn mixes with broad-leaved native forbs to further improve the soil health and function. Sod is not only farmed with high levels of fertilizers and other inputs, but also likely to contain a maximum of two species of grass.
- Avoid lawn irrigation. Grass species have evolved to be drought resistant. They will go dormant during periods of drought and often quickly revive when moisture returns. Embracing this seasonal, temporary shift in appearance will save cost, water, and avoid lengths of disposable plastic irrigation hoses underground. Watering one inch of water on a one acre yard consumes 26,000 gallons of water.
Gardens (Perennial, Vegetable/Annual)
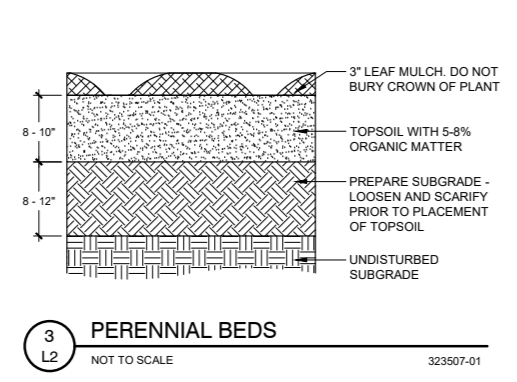
A healthy garden should support its intended vegetation with minimal additional annual inputs. Well-managed perennial gardens should have on average higher rates of carbon sequestration and more soil diverse soil biology than turf; however when they rely on regular rapid-release fertilizers and mulch applications they will never reach their full potential. To maximize the SOC capabilities of gardens, plants should be appropriately selected for the soil type and climate (avoiding irrigation if possible), and groundcovers should be established rather than relying on mulch for weed suppression. Here are example target characteristics for common types of gardens:
Perennial Gardens
- Subsoil Preparation:
- Decompaction (below topsoil): 8-12”
- Organic Matter Content: 2-3%, amend with compost in situ as necessary to achieve that level.
- Penetrometer meter reading <250 PSI in subsoil to depth of 20” below finished grade using ½” tip.
- Topsoil Preparation/Installation:
- Depth of topsoil 8-10”
- Organic Matter Content: 4-6%, amend with compost in situ as necessary
- pH: 6.0-7.0, modify with lime as indicated by soil test
- Penetrometer meter reading <200 PSI with to bottom of topsoil layer (8-10” below finished grade) using ½” tip
- Mulch + Plant: 3” of shredded clean leaf mulch or approved substitution applied around all plugs, landscape plants, trees, and shrubs.
Vegetable Gardens
- Subsoil Preparation:
- Decompaction (below topsoil): 8-12” or to depth of root ball. Scarify sides of hole.
- Organic Matter Content: 2-3%, amend with compost in situ as necessary
- Topsoil Preparation/Installation:
- Depth of topsoil 8-10”
- Organic Matter Content: 6-8%, amend with compost in situ as necessary
- pH: 6.5-7.0, modify with lime as indicated by soil test
- Mulch + Plant: 2” of weed free compost applied to soil surface as mulch
- Covercrop:
- Seed cover crop on all exposed, unplanted soils. Choose the cover crop based on timing and management regime.
Rain Gardens
- Rain gardens are site-specific. Target soil characteristics are determined by the onsite stormwater calculations, local regulations, and plant palette.
- Mulch + Plant: Plant establishment in rain gardens requires extra attention because of the necessity for well drained soils. Temporary irrigation may be necessary, as well as temporarily blocking the inflow to prevent recently established plants or seeds from drowning. Hydroseeding immediately after completing soil preparation, along with temporarily diverting the inflow, will support successful establishment of a seed mix
- Ponding for more than 24 hours after a significant rainfall may be an indication of high bulk density, or compaction, and need remediation.
Gardens that are protected need to be actively maintained during construction to avoid degradation that could result in their unplanned replacement at the end of the project. This may require temporary additional services from a landscape maintenance company if the water service on site will be interrupted during construction.
For former or damaged gardens of any type:
- Start with a soil test (see Specifying Amended + Blended Soils). Choose the lab and scope based on the analysis and intended garden type.
- If the area is compacted, hand decompact carefully around the existing plants using a broadfork or other manual aerator.
- After decompaction, amend according to the desired garden type. For vegetable gardens, rototil to incorporate an amendment and smother grass and weeds or use a ‘lasagna’ or ‘sheet’ mulching method to build up layers of organic matter.
- Sheet mulching can be used to very effectively rehabilitate neglected or weedy perennial gardens while avoiding the use of plastics-based landscape fabric. Use a double layer of commercially available paper mulch, wood chips, and compost. Groundcovers can be seeded or planted through the mulch. A core
Remove and store existing plants that will be replaced or likely damaged during construction.
- Timing is key for the success of relocating gardens. Two reliable options are preparing the new area and immediately transplanting them, or removing plants in the late fall after dormancy and before the ground freezes and storing them in a place protected from wind for replanting in the spring.
- Use the Critical Root Zone (CRZ) as guidance for the size of the rootball necessary for each plant.
- Use burlap to wrap the root balls of shrubs and small trees.
- If necessary, store plants temporarily in a shaded location. Pack them tightly to reduce the amount of air exposure to roots. Avoid heavily watering them, mist gently.
- If the storage time is anticipated to be longer than three weeks, the survival rate of the plants can be increased by heeling them into soil in a shaded location, or using wood chips to mound around the root balls for extra moisture retention and protection from air exposure.
Lawn is most often recreated by seeding or installed from sod rolls.
- Whenever possible, seed lawns. This allows for better root establishment, and greatly reduces the carbon footprint associated with intensive sod farming and transportation, unless the sod can be harvested from on site.
- Hydroseeding can save time and water resources, as well as protect soils from erosion. Hydroseeding can utilize a variety of natural wood fiber mulches, and incorporate native seeds into a lawn mix.
- Diversify lawn mixes with broad-leaved native forbs to further improve the soil health and function. Sod is not only farmed with high levels of fertilizers and other inputs, but also likely to contain a maximum of two species of grass.
- Avoid lawn irrigation. Grass species have evolved to be drought resistant. They will go dormant during periods of drought and often quickly revive when moisture returns. Embracing this seasonal, temporary shift in appearance will save cost, water, and avoid lengths of disposable plastic irrigation hoses underground. Watering one inch of water on a one acre yard consumes 26,000 gallons of water.
Meadow / Shrubland
In New England, meadows require a significantly different soil profile and establishment regime than traditional ornamental landscaping. Meadow species are generally adapted to more acidic soils, have low nutrient needs, and are drought tolerant. In many cases, adding too much organic matter, rapid-release nutrients, and irrigation to meadows and native shrublands will have detrimental effects on the final planting, increasing weed pressure and competition from invasive species.
Here are example target characteristics for establishing a meadow or native shrubland:
Meadow
- Subsoil Preparation:
- Decompaction (below topsoil): 4-6” in disturbed areas only.
- Organic Matter Content: 1-3%, (amendment not anticipated)
- Penetrometer meter reading <300 PSI in subsoil to depth of 12” below finished grade using ½” tip
- Topsoil Preparation/Installation
- Depth of topsoil 4-6”
- Organic Matter Content: 2-3%, (amendment not anticipated)
- pH: 5.5-6.0, modify with sulfur or lime as indicated by soil test
- Penetrometer meter reading <200 PSI to bottom of topsoil layer (4-6” below finished grade) using ½” tip
- Mulch + Plant: Hydroseed immediately after completing soil preparation with a cover crop. If seeding happens January 1 – August 1, plant grain oats; if August 1 – January 1, use grain rye.
Meadows are very easily compacted. Protecting them is essential to maintain healthy soil structure. In uncompacted soil, the roots of some grasses can penetrate up to eight feet underground. The farther down the roots grow, the higher the rates of carbon sequestration and water infiltration will be. Protecting the lawn completely from vehicle traffic is the only way to protect healthy soil function.
Meadows and shrublands may be rehabilitated by selective removal of unwanted species and strategic interventions that favor the preferred soil conditions and reproductive patterns of native meadow plants and shrubs.
- Avoid additional disturbance wherever possible. Remove unwanted plants that reproduce annually by seed by cutting before they produce viable seeds, rather than pulling the roots and exposing a new flush of seeds.
- To regenerate overgrown or neglected meadows and shrublands, mow or remove unwanted woody plants in the late fall. If regular mowing will be part of the management regime, it may not be necessary to pull the roots of unwanted woody plants. Mowing will control the resprouts.
- To transition turf to meadow with soil disturbance, consider dethatching and then using a combination of overseeding, plugs and amendments to shift the soil characteristics to favor native meadow species.
Existing meadows may be relocated successfully using intact soil lifts.
The following methods will maximize the soil health for newly established meadows and shrublands:
- Avoid chemical herbicides before establishment
- Combat weeds or undesired plants through tarping or repeated tilling before seeding meadows from scratch.
- Do not establish meadows with irrigation
Woodlands + Forests
After wetlands, upland woodlands and forests both store and sequester the largest amounts of soil organic carbon compared to other land cover types. Of all wetland types in Massachusetts, wetland forests store the largest total amount of soil organic carbon. The carbon in forest soils can continue accumulating for centuries if left undisturbed, as can the carbon in tree and forest biomass. Younger fast-growing trees capture carbon quickly but are relatively small in size. Older, mature trees have a slower growth and carbon capture rate, however, due to their greater size, they capture more carbon per year than young trees, in addition to having larger stores of carbon in their biomass. Because it takes so long for trees to reach maturity, it takes decades to hundreds of years for the biomass carbon in a mature tree that is cut down to be replaced by a young tree. Thus, near-term replacement of carbon stored in a mature tree requires the planting of hundreds of landscape-sized saplings to replace the carbon in a single mature tree.
Eventually, upland woodlands will reach a point where they no longer accumulate more carbon, entering a “steady state” where carbon gained from photosynthesis equals carbon lost through respiration. It can take decades to at least a century for most trees to reach this steady state. Because it will take decades to hundreds of years for mature tree biomass to be replaced by newly planted saplings, or require the planting of hundreds of landscape-sized saplings, mature trees and established woodlands should be prioritized for protection. The accumulation of organic debris, including fallen leaves, will increase the annual rate of carbon sequestration, although it can also inhibit the growth of understory plants.
Here are example target characteristics for a woodland or forest edge:
Forest Edge
- Subsoil Preparation:
- Decompaction (below topsoil): 4-6” in disturbed areas only.
- Organic Matter Content: 1-3%, (amendment not anticipated)
- Penetrometer meter reading <300 PSI in subsoil to depth of 12” below finished grade using ½” tip
- Topsoil Preparation/Installation
- Depth of topsoil 4-6”
- Organic Matter Content: 5-8%, (amendment not anticipated)
- pH: 5.5-6.0, modify with sulfur or lime as indicated by soil test
- Penetrometer meter reading <200 PSI to bottom of topsoil layer (4-6” below finished grade) using ½” tip
- Mulch with 2” of leaf mulch after planting bare-root trees and shrubs
There are a few key details to effectively protect mature trees and forests:
- Avoid disturbance and compaction within the Critical Root Zone of all protected trees. This means that the area of work may need to end up to 30’ from protected canopy trees.
- Forest edges have increased sunlight, wind, and exposure to nearby seedbanks, and are vulnerable to invasive species. If there is clearing or disturbance along a protected forest edge, the edge conditions should be addressed before the project completion. Some possible actions to repair a newly established forest edge include:
- Planting evergreen shrubs or trees along the edge to reduce the amount of sunlight that enters the mature forest floor;
- Establishing a designated area for annual leaf or woodchip disposal to smother volunteer annuals and build soil organic carbon; and
- Taking advantage of the edge conditions to increase the biodiversity by seeding a part-shade native understory mix into all disturbed areas of the forest edge.
The main factor in rehabilitating forest soils is time. Removing the understory plants and organic materials (downed limbs and leaves) from woodlands prohibits the build up of soil organic carbon, and depletes the trees and soil biome of future nutrients. In some cases, simply ceasing extractive management systems will be enough to rehabilitate forest soil. Other actions to rehabilitate forest areas include:
- Stored slash or downed material from adjacent areas
- Inoculations of mycelium
- Selected removal of invasive species
- Protection of heavily foraged native species, for example deer
- Exclosures around the base of white oak trees to protect seedlings
Relocating mature trees is possible, however it is expensive, risky, and requires large machinery. For historically or culturally significant plants this would be an option.
There are two main ways to recreate forests:
- Reforestation prepares large areas for planting fairly mature Landscape Nursery stock.
- Regeneration refers to the process of allowing a forest to re-establish with minimal disturbance to the existing area. Undesired species are removed, creating space for voluntary desired species to thrive. This method requires monitoring for up to a decade to curate the volunteers.
Resources + Tools
Case Studies + Applications
- Tree Protection Best Management Practices and Critical Root Zone [PDF] (Littleton, MA)
- Dying Trees at Flight 93 Memorial Prompt Rehabilitation Project (Stoystown, PA)
Soil Management
- Model Soil Plan Management Form (Appendix A2) | Toronto and Region Conservation Authority
- Soil Management Guidelines for Urban Construction | Toronto and Region Conservation Authority
- Preserving Topsoil During Construction | Sierra Club
Credentialing Programs
Applications + Tools
Tree Protection
- Preventing Construction Damage to Trees | MU Columbia Extension
- Tree Protection on Construction and Development Sites | Oregon State University Extension [PDF]
Final Grading
- Preserving and Restoring Healthy Soil | Toronto and Regional Conservation Authority
- Erosion and Sediment Control Best Management Practices | Maine DEP
- Post Construction Soil Depth + Quality | Vermont Stormwater Treatment Standards
Compaction
References
Jackson, S., Rhodes, L., Hilgeman, D., Maguire, T., & McHugh, M. (2022). Massachusetts Inland Wetland Replacement Guidelines, Second Edition. Massachusetts Department of Environmental Protection.
https://www.mass.gov/doc/massachusetts-inland-wetland-replacement-guidelines/download
Kees, G. (2008). Using Subsoiling To Reduce Soil Compaction toc (Nos.
Parker, W., Isbister, B., Hoyle, F., & Leopold, M. (2021). Soil Quality: 6. SoilsWest.
https://books.apple.com/au/book/soil-quality-6-soil-compaction/id1581017530


